Valentine's Mailbox

/
1 Comments
First thing's first, BIG thanks to the hubby for making my page pretty. He's an awesomely talented guy.

It's almost Valentine's Day which means my inner craft geek gets to come out! Part of me gets really excited about this and part of me thinks it sounds like a lot of work. Luckily, Audrie and I were able to agree on a creative yet not-too-much-work box.

We searched Pinterest high and low. There were Pony and Minion boxes but we both liked this mailbox. I got the idea from this Little Red Window post. Her how-to is really good so if you're going to make this box, I highly recommend you follow her instructions. If you want some pointers on what not to do, read on. I'm very happy with our finished product but I guarantee ours took more time and more coats of paint than hers. Here's what we ended up with.


And, in a nutshell, here's how we got there. Audrie helped with the box but in the beginning, there wasn't much for her to do. I barely trust myself to handle a box cutter. No way I'm handing it to my 5-year old. She started patiently waiting to paint the box at 6pm on Friday. She waited awhile.

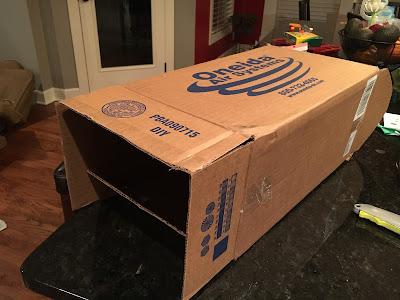
First step was cutting the longer flaps off the top of the box. This is where the arch of the mailbox will go.


I'd picked up an extra box as a back-up box (let's call this box #2) in case the first box (let's call this box #1) got broken beyond repair during the mailbox construction process. So next, I cut a side of box #2 off to make the arch for the top of the mailbox. There was no going back at this point. We HAD to make box #1 work.


To make the arch, I cut part of the way through the bottom side of the panel from box #2 with the box knife. Don't cut all the way through, just enough to get the piece to bend into the arch. The bending to the right size part is tricky, or at least it was for me. I'm positive there's a better way to do it but I just kept holding and cutting and holding and cutting until I got it perfect enough for a Kindergarten Valentine's Box (so not very perfect).

Audrie was dying to start painting the box so she'd do anything to help. I only had to say, "No, it's not time to paint," 6,397 times.


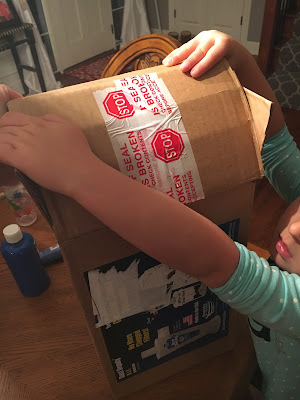
Take note, see all the stickers on the box? Yeah, I shoulda taken those off before painting, not after. We'll get to the painting fun later but definitely a lesson learned.

After getting the arched top somewhat cut right, we cut the side flaps of the box to match the arch. Again, this wasn't perfect but can be trimmed up later. Remember the longer flaps that were cut off the box in the beginning? It's really helpful to attach those to keep the side flaps of the arch up straight. I used hot glue to attach these but you could just use tape.


There's really no good way to explain how the curved piece was attached to the top of the mailbox. There was a lot of cussing and a sharing size M&M's was consumed (95% by me) before it was done. I ended up rigging it with a combination of a little hot glue and a lot of packing tape. For a while I struggled to squeeze my hand in one side to get the packing tape on the inside of the arch while still holding the arch from the other side...and then I realized I could open the bottom of the box and access the inside of the arch from there. It took wayyyyyyy too long to realize that.


Here's the assembled mailbox. I very, very gently cut a slit in the top for Valentines to go in. My rigged top can't handle much pressure so this was done very delicately. I also cut a door on the front of the box to get the valentines out.


Poor Audrie had been so patient but mom's (lack of) skills meant it was too late for painting on this night. 8am the next morning, it was time to paint and she was more than ready. So we painted. Remember those stickers? The paint we had didn't cover those so I tried to take them off but that didn't work either, they were just slimy and gross. So we primed the box. Yes, we put a coat of primer on a Valentine's box for a Kindergartner. I realize how ridiculous this is but it couldn't be helped. Box #2 had already been destroyed so we had to make this box #1 work.

After the primer we painted...and we painted...and we painted. Three coats of paint on this dang box. Audrie's arm got too tired so I had to take over. Lesson: posterboard paint doesn't cover cardboard very well. It might be the best blue and the biggest bottle at Target but it doesn't cover cardboard. This is what I get for being too lazy to go to Michael's. We were already at Target, their paint would work, right? Uh no. Here's what we had after three coats.


Not good, right? So we spray painted it and I'm glad we did. Some printed USPS logos attached to the side and this looks like a legitimate [Kindergarten Valentine's Day box] mailbox.


Audrie is very excited about her box and can't wait to take it to school which makes the frustration of failed posterboard paint and getting that dumb curved top on all worth it.

E


You may also like

1 comment :

  1. Love it! So much more work than I have ever wanted to go thru with Avery!! I think I did a difficult one two years total then we resorted to simple ones. Last year, duct tape... Best one ever!

    ReplyDelete